Migrating from CARTO Editor to CARTO Builder
Learn everything you need to know about the migration from Editor to CARTO Builder.
Welcome to CARTO Builder, a web-based drag-and-drop Location Intelligence tool for analysts and business users to discover and predict key insights from location data. This guide describes the migration of features from CARTO Editor to CARTO Builder.
CARTO Builder maintains all of CARTO Editor’s functionality, in addition to some compelling new features. This guide describes the standard workflow to help you understand the changes, from loading data to applying analysis, and publishing your map.
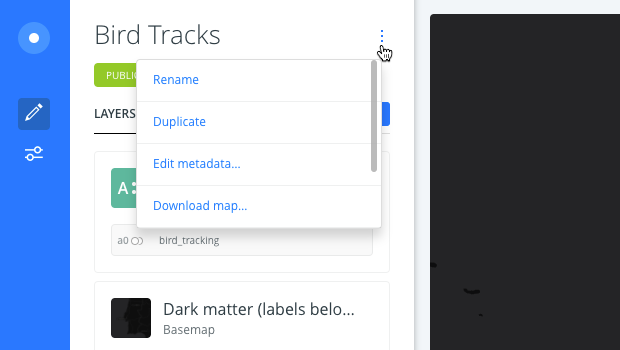
Map Details
Managing your map details is now available from the map name menu options.
Importing Data
Importing data into CARTO is still the same. Inside any map, click ADD to add map layers or connect external datasets.
Viewing Data
The Map and Dataset dashboards still exist, but appear differently as Map and Data pages. Clicking on a dataset opens the data in the Data View, where the dataset functions (export, edit, SQL) are still available. Clicking on a map opens the Map View in CARTO Builder, where all the map-making functions exist.
If you want to see your data on a map from the Data View, click PREVIEW in the bottom right corner, which enables you to preview how the data is visualized in a map.
Changing Data Types and Privacy
You can edit your dataset in the Data View. The process is similar to CARTO Editor, with the ability to reorder, change data types, rename the column, or add and delete columns, from the top of each column.
The Data View still contains all of the privacy settings for the individual dataset.
Creating a Map
At the bottom of the Data View, click CREATE MAP to create a map from the dataset. The map opens in CARTO Builder.
Layers
When you first open a map, Builder displays the LAYERS pane by default. This contains the top-level hierarchy of how datasets appear on your map. Map layers can be reordered from top to bottom. To add a new layer, click ADD to add more data.

Each map layer is organized by letter. ANALYSIS sublayers are assigned numbers in association with each map layer that it is applied to. For example, LAYER ‘A’ will have Source DATA as ‘a0’, and each ANALYSIS as ‘a1’, ‘a2’, and so on.
Basemaps
As a requirement, each map is created with a default basemap. This basemap appears as part of the LAYERS pane. Click on the basemap name to view, or edit, the SOURCE and STYLE for the basemap.
You cannot reorder how the basemap (and the corresponding basemap label, if applicable) appears. Some basemaps contain basemap labels, which are not editable. These labels are part of the selected basemap styling. Basemap labels appear as a separate map layer, and always appear as the first map layer.
Edit Layer Options
Most of the dataset management options appear under the LAYERS pane, which appear when you select the layer name menu options. Click EXPORT DATA (previously known as EXPORT LAYER) to view the options for the selected dataset.
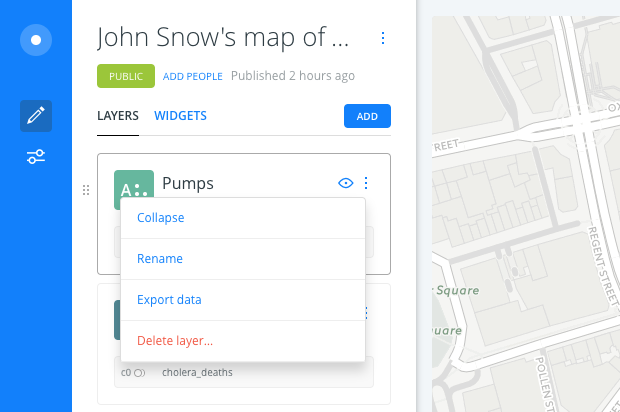
The Geocode and Merge with dataset options now appear as ANALYSIS options.
By clicking on a map layer, you can edit the DATA, apply ANALYSIS, customize your STYLE, add a POP-UP (previously known as INFOWINDOWS), and edit the LEGEND for the selected layer.
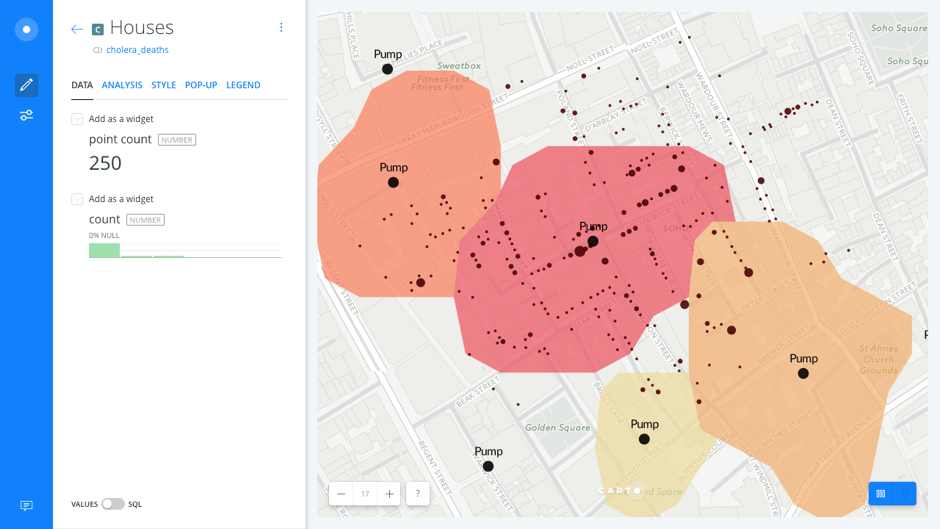
Data
When you click on a map layer, the DATA tab enables you to view the details of your data, and instantly add or edit WIDGETS to gain more insights from your data.
SQL
You can also apply a SQL query by using the slider button at the bottom of the DATA tab, which displays your data as VALUES or SQL code.
Switch Between Data view and Map view
The Data View and Map View appear as buttons on your map visualization when a map layer is selected. Click to switch between viewing your connected dataset as a table, or show the map view of your data.
Analysis
Analysis enables you to chain analysis workflows without having to apply SQL code.
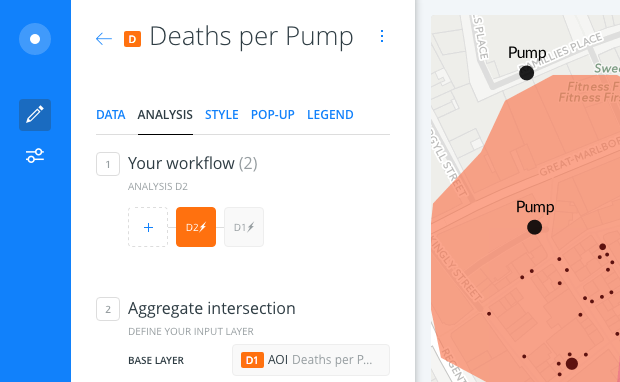
ANALYSIS options are available from any selected map layer. Multiple ANALYSIS nodes can be linked together to create a workflow. Once you have one analysis complete, adding a second and third analysis to create a more complex result is easy. Click the ‘+’ button from the ANALYSIS tab to create the next node in your workflow.
When the analysis completes, you can create a new layer from the results. Drag the named analysis out of the map layer, and drag it into the LAYERS pane above or below the selected layer. This is useful, as it keeps analysis functions separate from the base layers, enabling them to be styled separately, yet linked functionally. It makes for a flexible, iterative, and dynamic process in chaining and building analysis workflows.
To demonstrate the new potential of the ANALYSIS capabilities, the following common functions from CARTO Editor have been re-purposed into ANALYSIS functions in CARTO Builder.
Filters
Filters are now available through the ADD NEW ANALYSIS options, and are included as part of the analysis workflow.
Filters applies a SQL query to your data. You can view this read-only SQL code from the DATA tab of a selected map layer.
Geocode data
Once your unlocated data layer is imported, select the Geocode analysis option.
If you applied a geocoding analysis to a synced dataset, the analysis automatically re-runs every time the data updates, keeping your map updated.
Join Data
Joining two datasets is simpler in CARTO Builder, and requires no SQL code. To join two datasets together, select the Add Columns from 2nd Dataset ANALYIS option. The parameters (Left/Inner join, columns to keep, key column, and so on) for combining the two datasets are provided as options that you can easily select. The results can be viewed directly from the Data View of the map layer.
Area of Influence

To build an area of influence (also known as a ‘buffer’) around a point, line, or polygon in CARTO Editor, it took a bit of SQL knowledge. Create Travel or Distance Buffers is now available through the ANALYSIS options, and enables you to create a buffer by time and distance. You can even create an area of influence using synced data.
More Analysis Options
This guide only covers a few of our ANALYSIS options. To learn more about our extended list of analyses, and how to apply them, view our Analysis Guides.
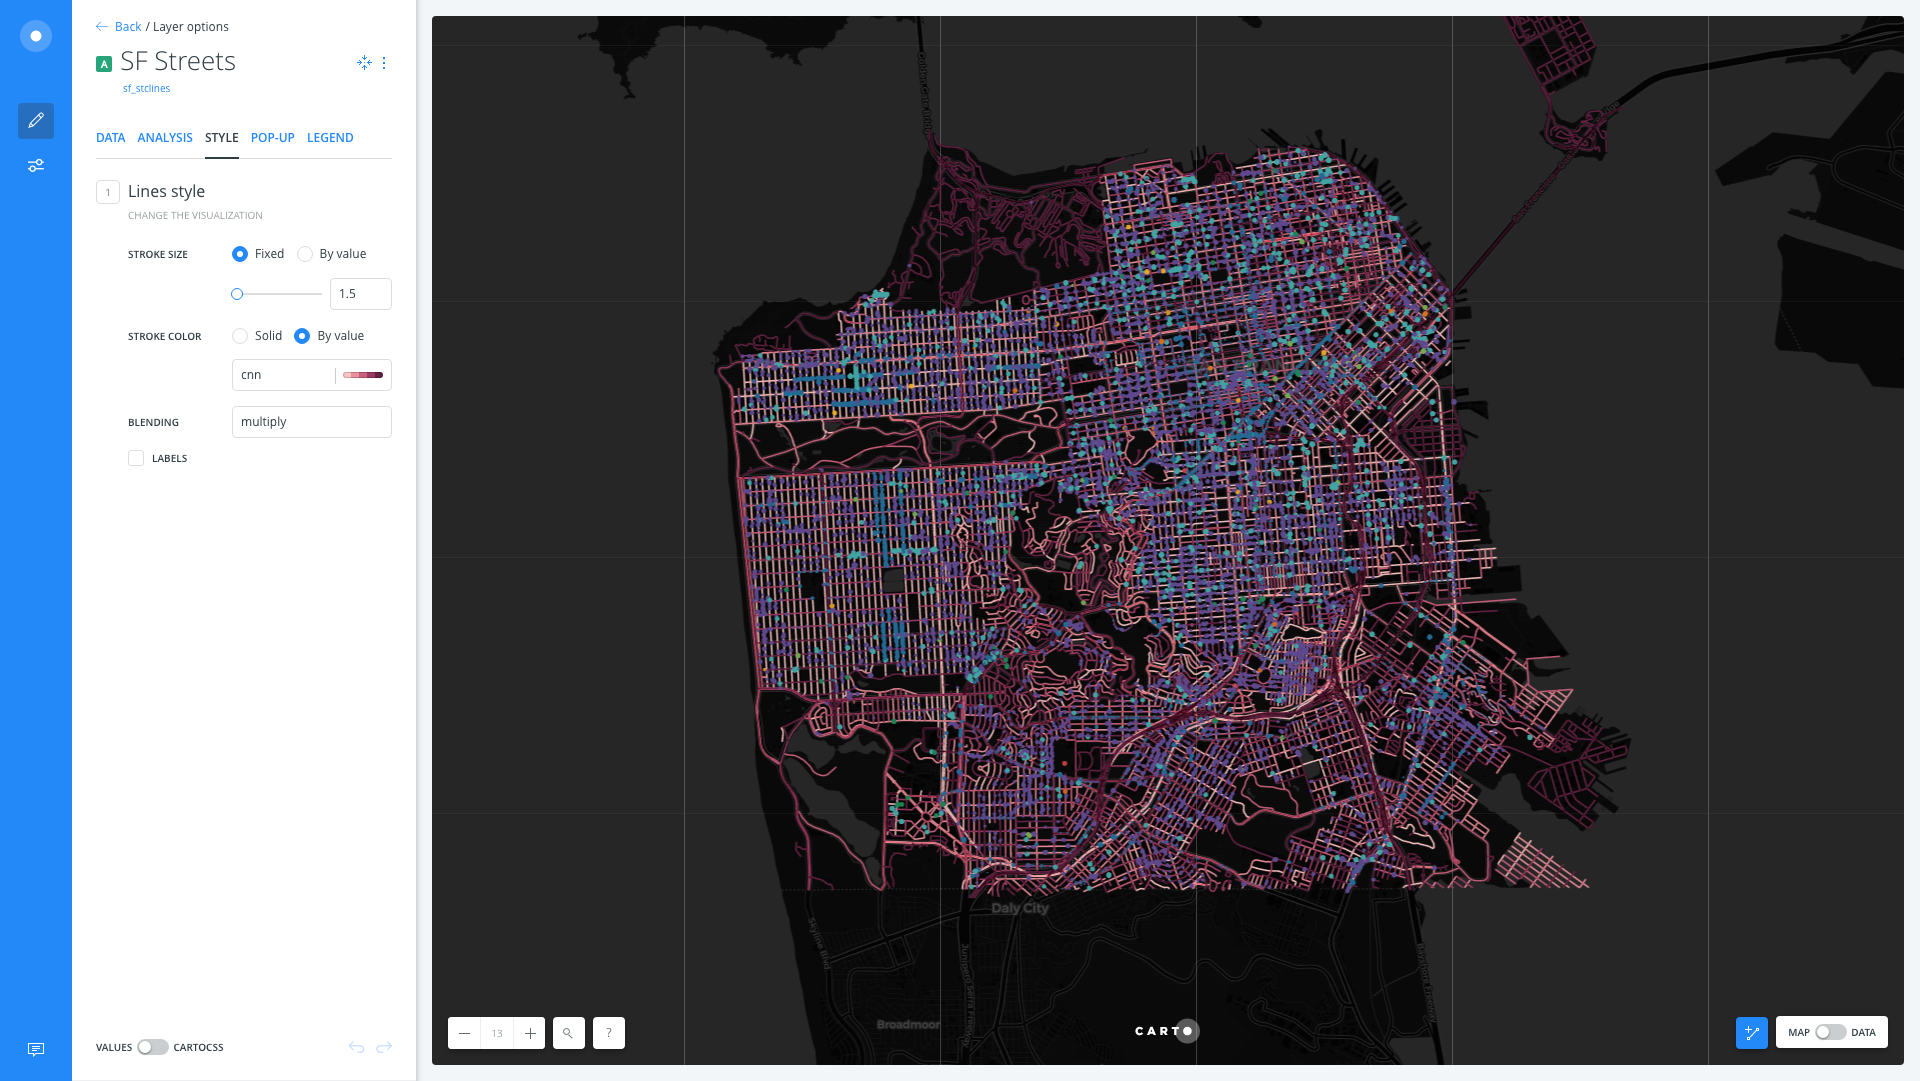
Style
WIZARDS from CARTO Editor are now called STYLES. Click on any map layer to view and edit the STYLE options. You can apply map styling based on an aggregation style, and define options by geometry attributes, or by a column value.
STYLING options are dependent on your data.
Most of the former WIZARD options (Quantification, Buckets, and so on) now appear as part of the different styling options.
From Map Types to Aggregation Types
The map types from CARTO Editor WIZARDS no longer exist by name. Case studies indicated that most users customized our default map types to include more features. While the names of our map types no longer exist, the actual aggregation and values behind those map types are featured as STYLE options in CARTO Builder, offering you greater flexibility to enhance the individual style features on your map.
For example, if your map contains time-series data for point geometries, ANIMATED appears as an AGGREGATION option from the STYLE tab, enabling you to create Torque animation. Additionally, the PIXEL aggregation option allows you to create a Torque heatmap.
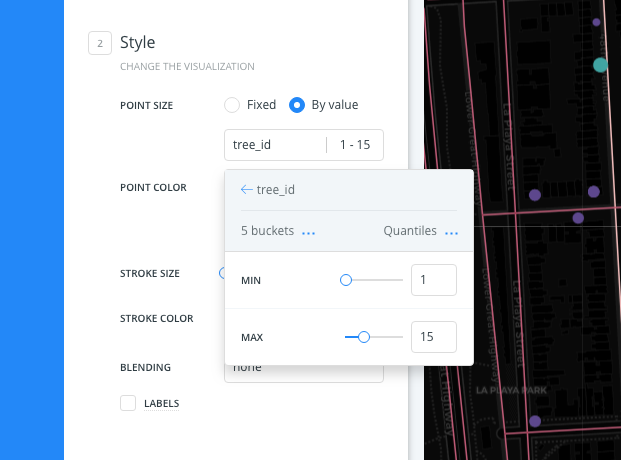
Styling Points
To set points at a single size, click the Fixed option for POINT SIZE (this is the default option). To make the points data-driven, click the By Value option for POINT SIZE and choose a column (only the columns with number values are displayed). You can set the minimum and maximum size. This is the same as CARTO Editor’s BUBBLE map style.
CartoCSS
You can always use your CartoCSS skills to leverage all the power of CartoCSS. From any selected map layer, click the slider button, located at the bottom on the STYLE tab, to display the STYLE options as VALUES or CartoCSS code.
The STYLE tab locks the method in how you apply styling. To avoid losing custom styling, decide how you want to apply styling, either with CartoCSS or with the graphical user interface STYLE options.
Composite Operations
Editor COMPOSITE OPERATIONS have been renamed, and appear as BLENDING options in CARTO Builder. These options style the way colors of overlapping geometries interact with each other. Learn more in our Style Guides or view CartoCSS Composite Operations for descriptions about the effects of these blending options.
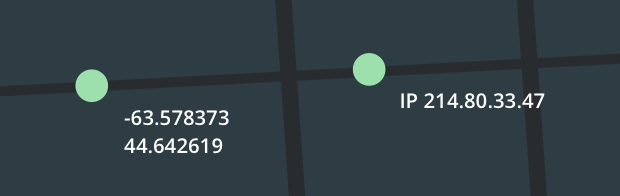
Pop-Ups
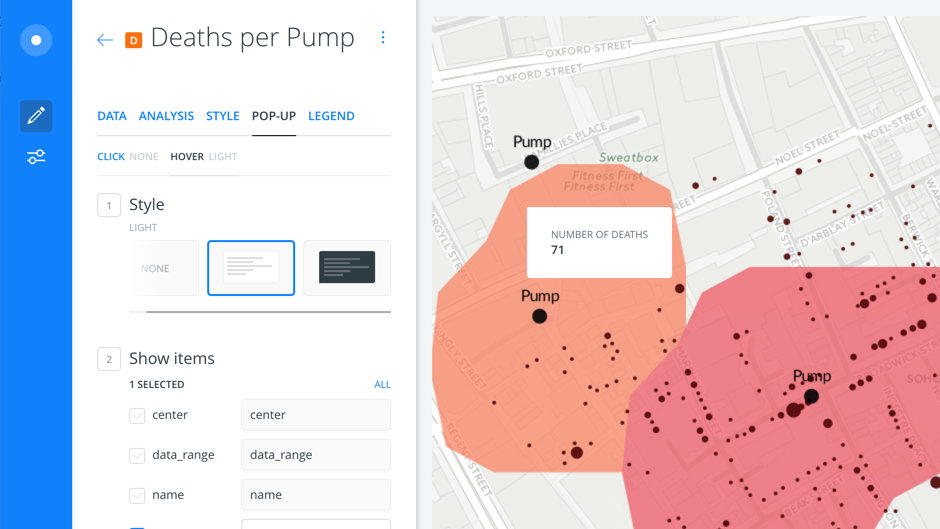
The previously named INFOWINDOW in Editor now appears as POP-UP options CARTO Builder. Select any map layer to view the POP-UP tab, and select from a much wider range of options.
Legends
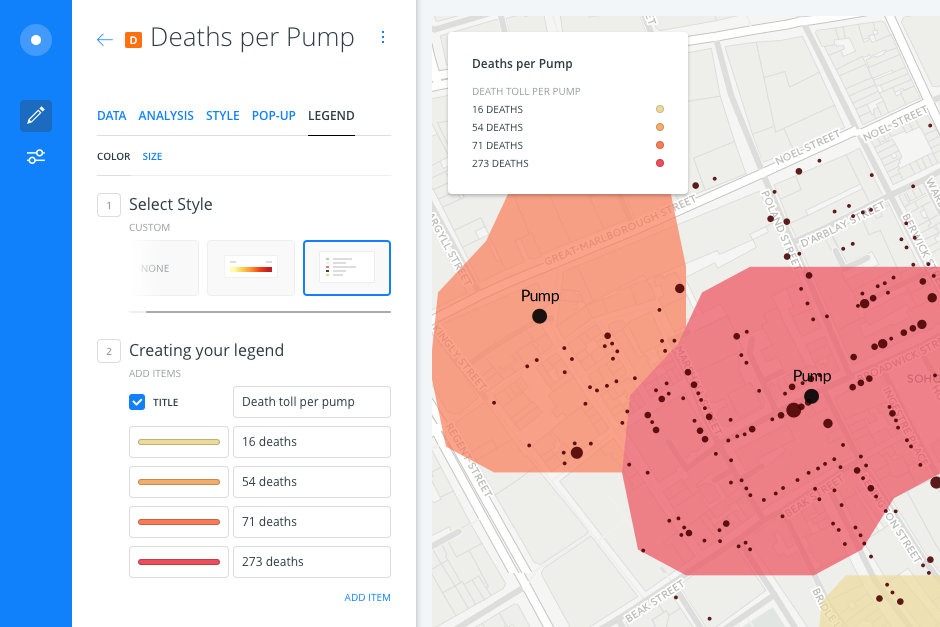
Select any map layer to view the LEGEND tab. Select a style for your legend, or create your own legend. Legends are generated dynamically, which you can turn on or off through the Map Options on the Builder toolbar. You can also control the legend’s color schemes and labeling.
Widgets
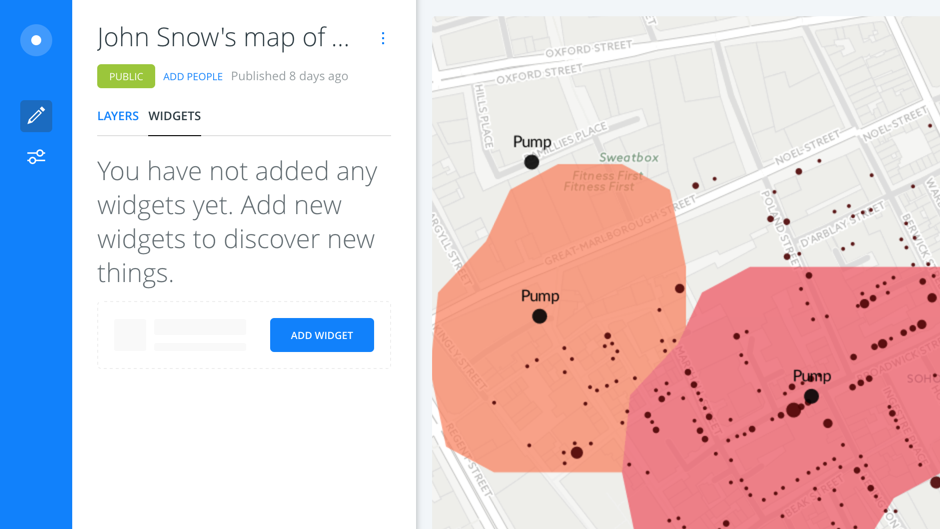
To gain insights from your data, an interactive series of widgets is embedded on your map, each tied to a selected column in your data. To learn more about widgets, and how to add them to a map, view the Exploring Data with Widgets Guide.
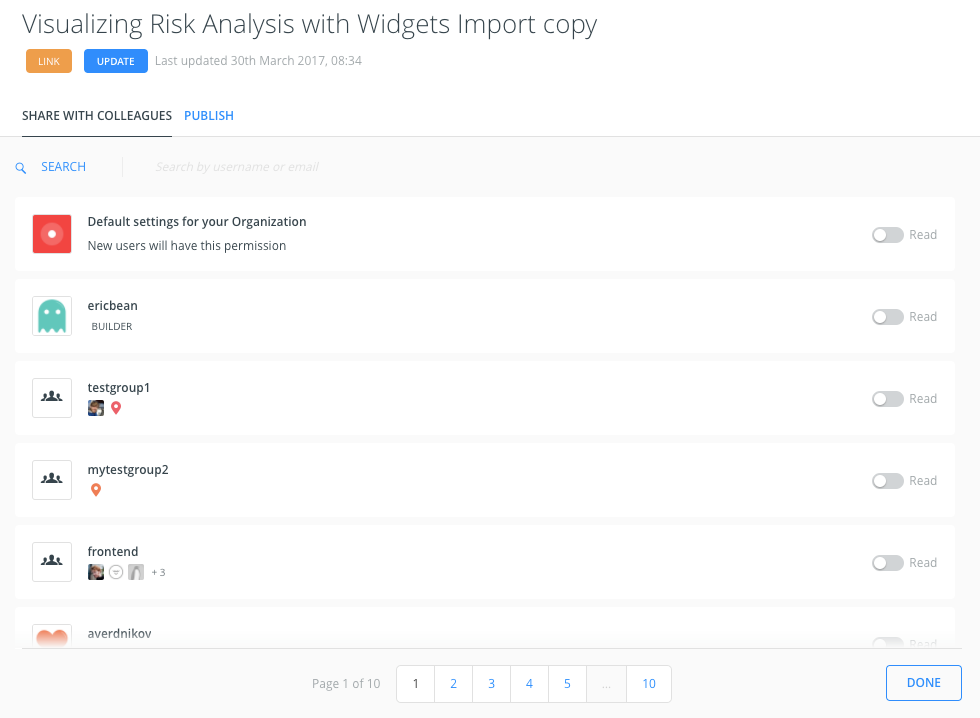
Publish and Share
All of the publishing and sharing options now appear when you click on the PUBLISH button, located on the bottom of the LAYERS pane in Builder. You can set privacy settings, share maps with your colleagues (if you have an Enterprise account), and publish your maps.

Publishing options are the same as they used to be, producing a direct web link or an iframe. There is also an UPDATE option, to give you more control over when your map is published live, making staging possible in CARTO Builder.
Privacy
The same privacy settings that you know from CARTO Editor are still available.
Share with Colleagues
Enterprise accounts have the option for team-sharing, and the functionality is the same as CARTO Editor where you can search, assign, and share with your team.
Publish
This is a new function that helps keep your map updated, but only at your consent. Click PUBLISH (from the LAYERS pane in Builder) to post your map live. If you make edits to your map, click PUBLISH again to view the publish options. Click UPDATE to re-publish your changes live. All work is staged until you “update” it.
Limitations
The Viz.json feature is not compatible with CARTO Builder. This feature is only compatible with Editor and CARTO.js library v3.
Find further information on Editor maps migrated to Builder on this article
FAQ
Can I still access my old maps?
Yes, all legacy maps that were created in CARTO Editor are forward compatible and will automatically open in CARTO Builder.
Can I use CARTO Editor and CARTO Builder at the same time?
No, once CARTO Builder is enabled for your account, it is the only available map tool.
Can I choose to use CARTO Editor instead?
No, CARTO Editor is currently in the process of being deprecated. All Editor features, and additional advanced functionality, is available within CARTO Builder. Once CARTO Builder is enabled for your account, the CARTO Editor is no longer available.
Are there any examples of how to use CARTO Builder?
When CARTO Builder is enabled for your account, you will receive an activation email that contains a link to a short video tutorial. Visit our HELP Center hub for Tutorials, or join one of our free Webinars to start learning how to use CARTO Builder.
Are there any features in CARTO Builder that affect quotas, or other geocoding credits, for the user account?
Yes, some ANALYSIS options will query and modify your data layers, and are subject to quota limitations.
Not all ANALYSIS options affect quota usage. It only applies to the options that involve data enrichment or Location Data Services. Each analysis option is described in CARTO Builder, and indicates which ones are subject to quota limitations.
Where can I find the Geocoding options?
You can now access the Geocoding options through the ANALYSIS options. See the Geocode Guide for details.
Contact us
Please contact us if you have any additional questions or concerns.